AI Texture Optimizer for MSFS and Prepar3D
User Note
This is advanced tool that will create new texture files for AI aircraft in your simulator. It requires knowledge of the installation paths of your simulator and how to use the command line within Windows. While it will not manipulate the original files you specify, it may have unintended side effects to your simulator installation if used incorrectly. You should have NO expectation of support for this tool or your simulator installation. You have been warned.
HOW THIS WORKS
This tool will batch-convert textures for AI aircraft. It will automatically re-size and re-compress the textures to the size you specify. This can reduce the VRAM and CPU/GPU cycles necessary when using a simulator with a high number of AI aircraft visible. It can also clean up issues with differing texture formats across AI aircraft, improving your simulator's performance when you have a lot of AI aicraft around. A list of features:
- Optimizes textures to the size you specify, allowing you to balance quality and performance of AI textures.
- Supports any and all versions of Prepar3D and Microsoft Flight Simulator 2020.
- Works with add-on third-party AI packages such as AIG and FSLTL.
- Creates a fully separate optimized directory, leaving the original files un-touched.
- Propertly handles various input formats such as BMP and DDS, optimizing to DXT5 textures with mipmaps.
- Corrects odd artifacts with alpha channels and improper flipping of DDS textures in original texture files that result in funny looking AI when textures are processed with other tools.
Installation
Install the Texture Optimizer
Installation requires downloading and installing the Texture Optimizer. You can download from the link below:
Download Texture Optimizer 1.4 BETA (2023-09-10)
Once downloaded, do the following:
- Unzip the package to a folder on your computer. The less complicated the path, the easier the command line instructions will be.
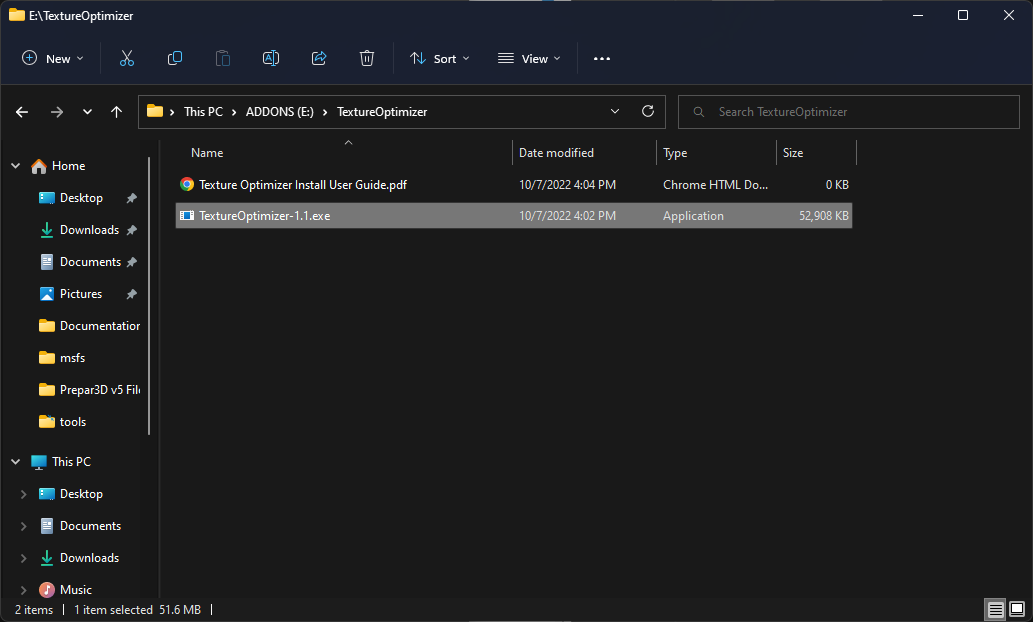
- Run the executable file that is extracted from the ZIP.
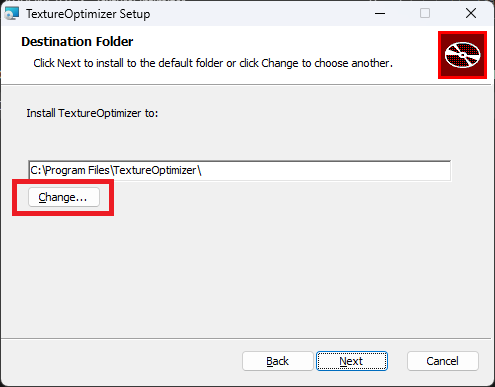
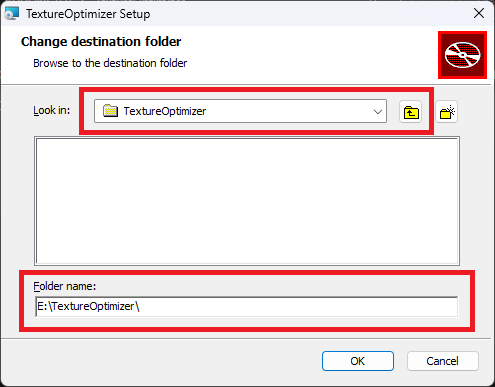
- When prompted, DO NOT install into the Program Files directory! Instead, select the same folder where you extracted the ZIP file.
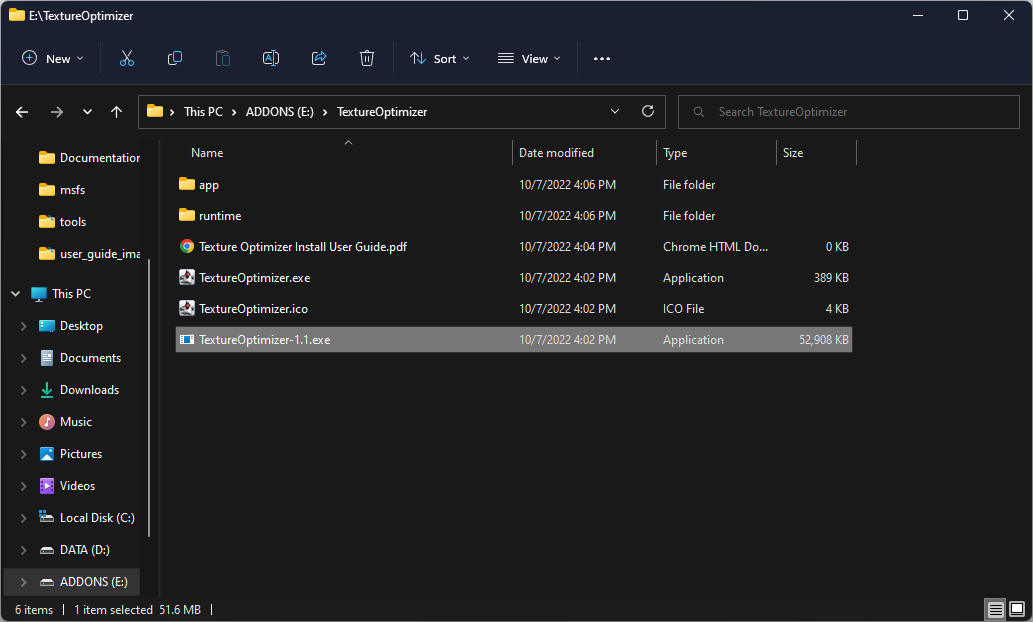
- When the installation is complete, verify you have the following files installed into the directory you specified.
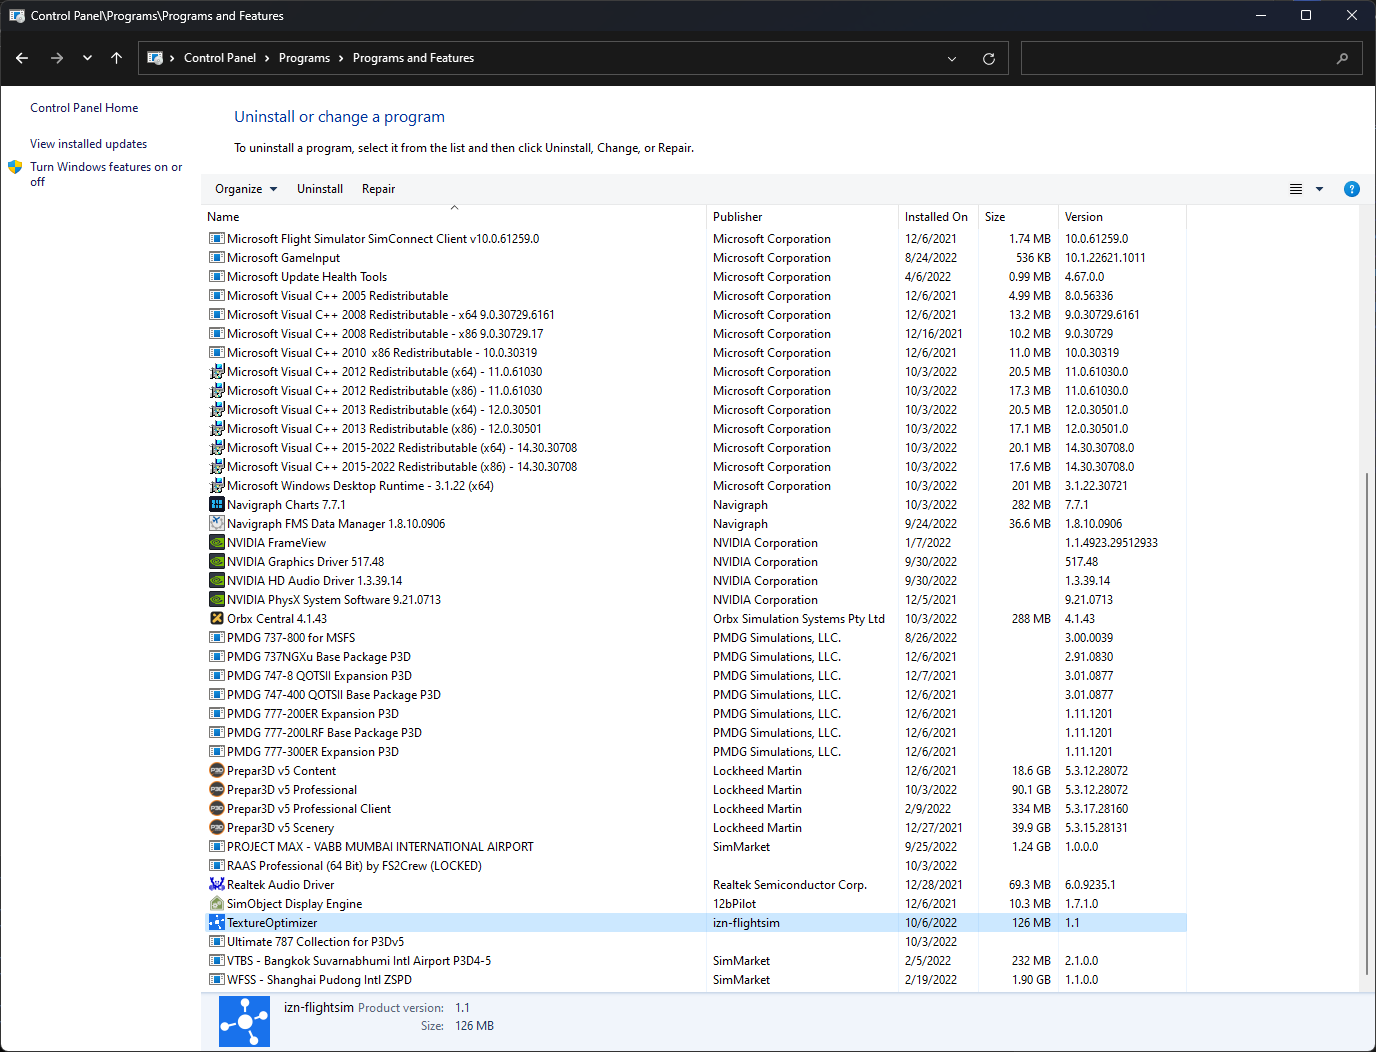
If you want to un-install the Texture Optimizer, you can do so from the Control Panel within Windows just like any other program.
Install GPU Open Tools Compressonator CLI
Many textures in the new MSFS packages use new, optimized image compression that requires use of the GPU to decode properly without artifacts. To do so requires an open-source third-party tool called Compressonator CLI. Note: This installation is REQUIRED.
Download Compressonator CLI from Github
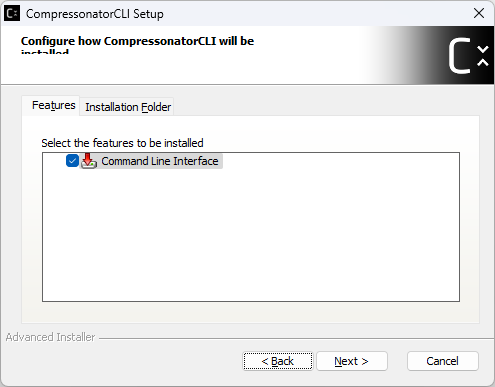
NOTE: You MUST download the CLI (Command Line Interface) version of Compressonator. The full GUI version will not work.
Once downloaded, do the following:
- Run the executable that is downloaded. Double-check that it is the CLI version of Compressonator.
- Select a directory to install Compressonator CLI. It doesn't matter where, but it is helpful if you place it somewhere convenient with a short path.

If you want to un-install Compressonator CLI, you can do so from the Control Panel within Windows just like any other program.
Install Microsoft DirectX Texture Tools - Texconv
In addition to Compressonator, the Texture Optimizer requires a Microsoft tool called TexConv. This tool properly handles newer DirectX11 and DirectX12 texture compression formats that will cause issues with MSFS.
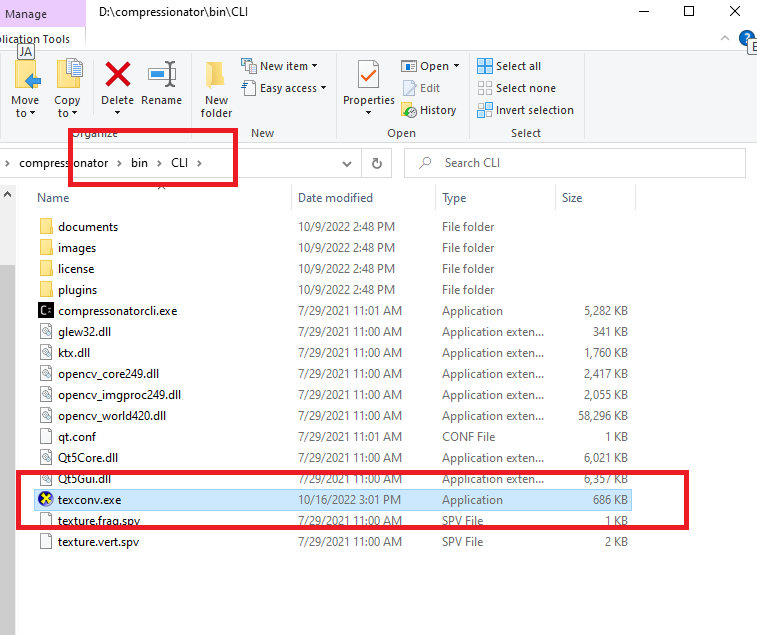
NOTE: You should download the texconv.exe file to the same directory as your Compressonator CLI tool, within the \bin\cli directory of your Compressonator installation. If you do not, the Texture Optimizer will not detect the proper installation of Texconv and fail.
Once downloaded, do the following:
- If you did not download directly to the Compressonator\bin\cli folder, copy the texconv.exe file from the folder it was saved during downlaod to
the bin\cli folder of your Compressonator installation.
User Guide
Usage of the Texture Optimizer is via the command line. In most versions of Windows, it can be access by clicking on the "Start" button, typing "cmd" and hitting enter. Once you have a command window open, you will need to navigate to the folder where the Texture Optimizer is installed. You do this via the "cd" command. If you do not know how do to this, consider it a sign...Maybe this ain't the right tool for you. :-)
Once you are in the proper directory on the command line, use of the Texture Optimizer is as follows:
textureoptimizer -source <source folder> -resolution <image resolution>

Both arguments are required. Here's what they do:
-source
This should be the folder path for the AI texture files you want to optimize. As an example, if you want to optimize the textures for the FSLTL package for
Microsoft Flight Simulator, you would point this to the FSLTL directory inside your MSFS Community folder. During the installation of MSFS, if you set your
path to "D:\MSFS\Community" and you wanted to update the FSLTL package, you'd use:
"D:/MSFS/Community/fsltl-beta-airplanes"
-resolution
This should be the resolution to which you want the textures resized. Valid settings are:
- 4096
- 2048
- 1024
- 512
- 256
A complete command line example:
textureoptimizer -source "D:/MSFS/Community/fsltl-traffic-base" -resolution 2048
Hit enter and let it run.
Note: When you run the Texture Optimizer, it will search for an installation of Texconv and Compressonator. It will display the following text if detected, with the appropriate path for your installation displayed.
DIRECT3D TEXCONV INSTALLATION DETECTED IN D:\compressionator\bin\cli
If either Compressonator or Texconv is not installed correctly as described above, you will see one of the below messages and the Texture Optimizer will fail.
DIRECT3D TEXCONV INSTALLATION WAS NOT DETECTED. DIRECT3D TEXCONV IS REQUIRED BY THE TEXTURE OPTIMIZER.
DIRECT3D TEXCONV INSTALLATION DETECTED IN <installation path>
Compressonator INSTALLATION WAS NOT DETECTED.  IT IS A REQUIRED COMPONENT OF DIRECT3D TEXCONV.  TEXTURE OPTIMIZER CANNOT CONTINUE.
In the same location as your source folder, a new directory will be created with "-OPTIMIZED" appended to the folder name. This will be the folder
that contains all the files processed by the Texture Optimizer.

Most AI packages contain thousands of files that are gigabytes in size. As a result, it will take a while for the Texture Optimizer to run. The command line will show the progress that is being made with a rudimentary percent complete scale. Converting textures is CPU-intensive. If you have a slower computer and significant AI packages downloaded (100s of airlines from AIG as an example) this process may take hours.
When the Texture Optimizer Completes
When completed, the Texture Optimizer will provide you with some statistics on what it processed, such as the number of textures and the resulting file sizes. All
the files it processes will be in the folder it created with the name ending in "-OPTIMIZED".
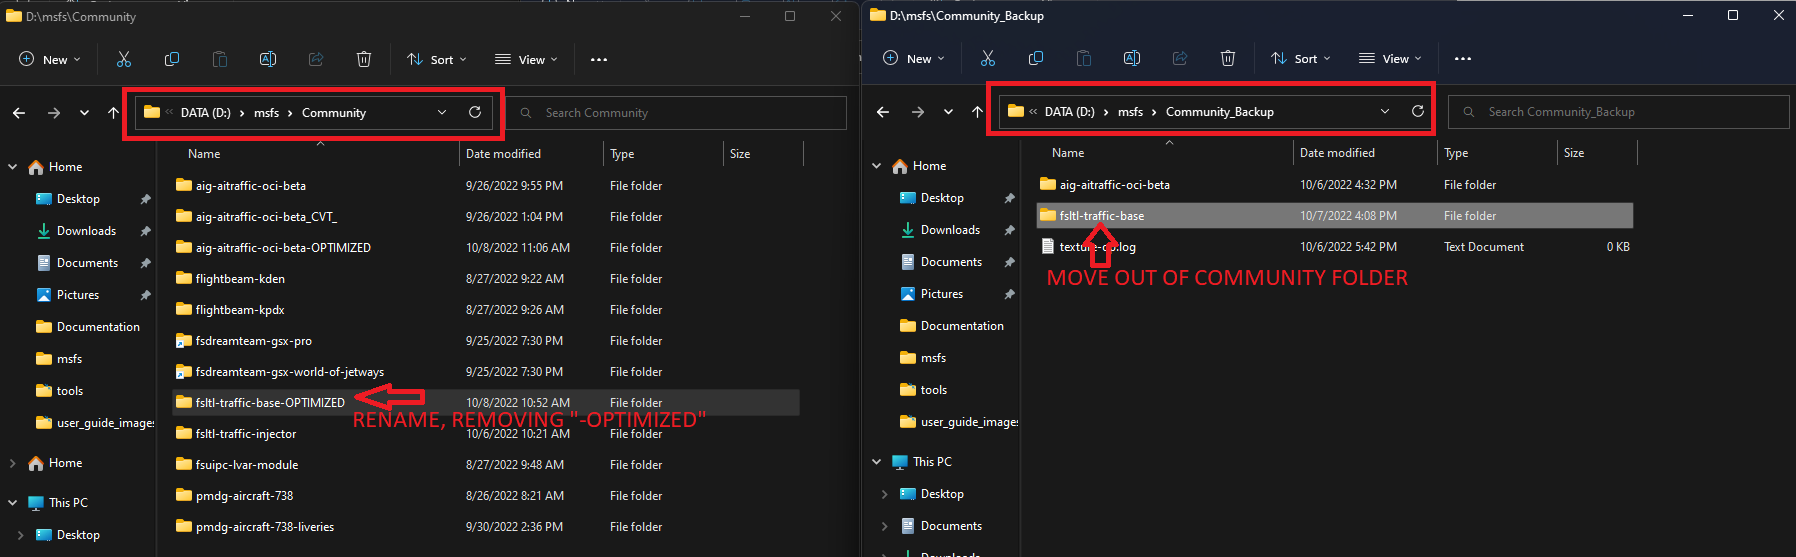
In order to use these textures, you need to move the original files out of the path of your simulator (The Community folder for MSFS, or the add-on specified folder for P3D). After you have moved the originals, you need to rename the "-OPTIMIZED" folder to the original name of your source folder. Simply remove "-OPTIMIZED" from the folder name.
Optional Advanced Usage
-mipmaps
You can explicitly set how you would like mipmaps in the output files generated. There are three options:
- auto (Default)
- on
- off
auto
Will use the default mode for determining whether mipmaps should be generated. The Texture Optimizer makes this determination automatically, based on the
whether the input image contained mipmaps (if a DDS/DXT image), and if the output image size is greater than or equal to 512 pixels in dimension. If either of those
criteria are true, mipmaps will be generated.
on
Forces the generation of mipmaps for all textures, regardless of size, input format, or desired output format.
off
Explicitly prevents the generation of mipmaps for all textures, regardless of size, input format, or desired output format.
-mipmaps on
-dxt
You can explicitly set the DDS/DXT output format for textures. There are four options:
- auto (Default)
- DXT1
- DXT3
- DXT5
Note: You may observe odd visual artifacts within your simulator due to issues with alpha channels when forcing DXT1 or DXT3 formats.
auto
Will use the default mode for generating output textures. By default, all output textures will be converted to DXT5, unless the source texture was DXT1 or DXT3,
in which case it will preserve the same format.
DXT1
Forces DXT1 as the DDS output format for all textures, regardless of size or input format. Mipmaps may or may not be created, depending on optional -mipmaps
argument or automatic calculation of mipmaps generation.
DXT3
Forces DXT3 as the DDS output format for all textures, regardless of size or input format. Mipmaps may or may not be created, depending on optional -mipmaps
argument or automatic calculation of mipmaps generation.
DXT5
Forces DXT5 as the DDS output format for all textures, regardless of size or input format. Mipmaps may or may not be created, depending on optional -mipmaps
argument or automatic calculation of mipmaps generation.
-dxt DXT5
-resizesmaller
Specifies if images that are smaller than the target resolution should be resized (most often up-scaled) to the target resolution.
- true
- false (Default)
true
Will force the resize of all images, regardless of size, to the target resolution you specify.
false
Will only resize images that are the same size or larger than the target resolution you specify.
-resizesmaller true
-reformatsmaller
Defines whether images smaller than the target resolution should be reformatted into the specified image format.
- true (Default)
- false
true
Will reformat all images, regardless of size, to the specified output format (if "auto" is chosen as the output format, which is the default, it's processing
rules will be applied).
false
Will only reformat images that are equal to or larger than the specified target resolution.
-reformatsmaller true
-debuginput
Sets whether to write metadata of input textures to the console.
- true
- false (Default)
-debuginput true
-debugoutput
Sets whether to write metadata of output textures to the console.
- true
- false (Default)
-debugoutput true
-global <global texture directory>
EXPERIMENTAL. DO NOT USE YET. Sets whether to use a global texture directory to optimize duplicate textures that are identical to a global texture directory.
This is useful for AI packages that contain default textures like engine fans, lights, effects, etc. that are often included in third-party re-paints. This
often leads to extra disk usage and texture loading that can be avoided by using a global texture and specifying the texture.cfg properly. Useful for AIG
packages that use FSPXAI models.
-global "D:\msfs\Community\third-party-textures"
User Note
If you want to re-run the Texture Optimizer after updating existing packages, it will not process any files that exist in the output folder it creates. This will greatly speed up future runs of the Texture Optimizer as your AI packages grow or as you add new airlines. However, should you want to change the image resolution or otherwise re-process all the textures, you must DELETE the output folder that is created. When you do, use "SHIFT-Delete" on the keyboard to permanently delete the folder. Otherwise you will fill up your disk space with items in the recycle bin.
Re-Running the Texture Optimizer
There are two primary reasons to re-run the Texture Optimizer. The first is when you add new AI packages, or one of the AI packages you use has updates to airlines or aircraft that include new textures. The second is when you want to re-generate new optimized textures for all AI aicraft.
Generating textures for new AI package updates:
- The folder in your MSFS Community or Prepar3D add-on with AI should be the optimized package. Rename the folder to end with "-OPTIMIZED"
- Copy the original folder from your AI package back into your Community/add-on folder for your simulator.
- Update the package per the instructions provided by the provider of your AI package(s)
- Re-run the Texture Optimizer as described above, with the same path and resolution arguments. Only new textures will be processed, making it go much faster.
- Copy the original folder to another location and rename the updated "-OPTIMIZED" folder as described above.
Re-generating all textures:
- Verify you have the original files from your AI package(s) somewhere else on your computer.
- Highlight the optimized AI package in your Community/add-on folder and hold down SHIFT and hit delete. This will permanently delete (not recycle) the entire folder. This is irreversable.
- Copy the original folder from your AI package back into your Community/add-on folder for your simulator.
- Re-run the Texture Optimizer as described above.
- Copy the original folder to another location and rename the updated "-OPTIMIZED" folder as described above.
© 2023 izn-flightsim. No part of this work may be copied or otherwise reproduced, in whole or in part, without the express written consent of the author. This tool is provided with NO WARRANTY, either expressed or implied. Mis-configuration or inoperability of software may occur whether through use of this tool or a software defect within it and no support is provided. This tool is an independent development for Prepar3D and Microsoft Flight Simulator and is not endorsed, supported, blessed, or otherwise promoted by Lockheed Martin and/or Microsoft.